Monthly Archives: May 2013
DMV
Thursday 7:45am
Headed to DMV for the 1st round.
It took 2.5 hours, mainly because they had never done a SPCNS before, and had to read the manual. They took my check for the sales & other taxes & charged me additional penalty fees ($568) because when I had paid for the kit in January I had paid no taxes.
I got a form 124 to visit the CHP.
I got a SPCNS number – they told me it would be 6 to 8 weeks before I hear back, but that I should set up an appointment with BAR and give them the SPCNS number.
I got a one day permit to get the Brake & Light inspection. They also told me that there’s a new inspection station in Tahoe City (which is much closer than Grass Valley/Nevada City).
Next, I’ve got to get some insurance then make appointments.
Toe-out or Toe-in
Wednesday 7am
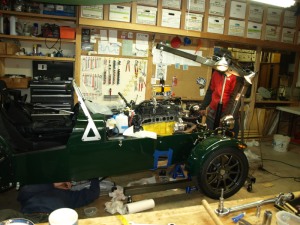
Need to check the front wheel alignment for toe-out, it certainly looks like its toeing out. I used a couple of 2x4s and bungee cords on the front wheels and marked out 50cm fore and back from the wheel centers. See pics, you’ll get the idea.


Now, you’ll notice that the 2x4s are not parallel to the ground and I do have some negative camber – so that will throw off the measurements.
The first set of measurements were:
Front 1677mm ( to the outsides of the 2x4s)
Rear 1636mm
Difference 41 mm
Using some trig, I figured this was 1 degree 10 minutes toe out on each wheel
So, I won’t bore you with all the successive settings and readings, but I ended up screwing-in both the tie-rod ends in by 2 full turns each resulting in:
Front 1649mm
Rear 1657mm
Difference 8 mm
Angle 0 degree 14 minutes toe in on each wheel
The manual said 10 minutes toe-in – so I figured this was good enough untill I can send it for a proper wheel alignment. This would also indicate that I’m getting 21 minutes of angle change per 1 turn of a tie-rod end. So how do you fine tune the alignment if you can only adjust by full turns?
Un-clutched.
Tuesday morning 5:30am
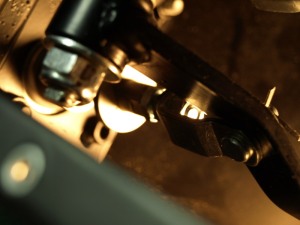
Isn’t jet lag wonderfull. Anyway, it gave me the opportunity to finish off yesterday’s engine install. Got everything done by 7:30am and started the car. As I expected, the clutch was still not disengaging. I called Jon at Caterham and he gave me a rundown on how to adjust the pedal. If you look at this picture I drew, you can see the before & after. Basically, I need to move out the clevis by 1/4″ untill the clevis captive nut is flush with the end of the shaft. Tighten its lock nut. Then move the clutch stop plate out, leaving about 1/8″ between the 2 lock nuts.

Easier said than done. It took about 90 minutes. My hands were too big. I couldn’t get enough wrench movement accessing from the top, so had to climb into the pedal box head first from the driver seat. The split pin securing the clevis pin took about 30 minutes to remove. Eventally it looked like the after picture. Also took a couple of photos.

Started the engine and successfully dis-engaged the clutch to get into both 1st & reverse.
Randy had sent me the speedo calibration method, so I set that up.
1.There is a rubber button on the speedo. Press that and turn the car ignition on. Wait 3 seconds.
2.It should now be in calibration mode and the odometer display will flash.
3.The first number can be changed by pushing and releasing the button. Holding the button down for 3 seconds will set the number and then it will sequence to the next number to the right.
4.The total number should be…. Number of rear tire revs per mile x number of teeth. Which is 43 teeth
5.Assume tire is 21.5″ dia or 21.5*pi = 67.54″ travel per revolution. 938*43 = 40334
6.Your number should be 0 4 0 3 3 4
Took the car out onto the private road, gearchanges are fine and the speedo reads good – did not exceed 35mph this time.
Out again
Monday, Memorial day.
Jon from Caterham called, he’d heard I was having trouble with the clutch. We talked for several minutes, then he asked, “did you install the bearing at the end of the crankshaft”. “What bearing”, I replied. Then I remembered a mysterious bearing in my group of un-identified parts from the end of April. Sure enough, there was the bearing that’s supposed to go at the end of the crankshaft that mates with the shaft from the gearbox.

So, my day’s agenda was set, out with the engine, split the gearbox, remove pressure plate & clutch, in with the bearig and get it back in. Alex was here to help.

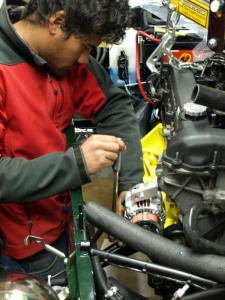
The actual bearing was pretty tight going in, the end of the crankshaft was rusted and obviously no bearing had been there before. Whacked it in with a slightly smaller socket with the help of a hammer. The re-assembled the engine/gearbox.

I found an oil leak from the top of the gearbox cover, so re-applied the lid with gasket sealant.

Got the engine bolted in by 4:30pm, but had to call it a day – we’d been invited out for dinner. Next jobs, connect up the starter, install oils (gearbox & engine), coolant (50% anti-freeze), electrics connections.


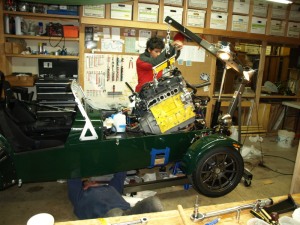
This is the 3rd time installing the engine, I’m getting used it by now (reminds me of a Monty Python joke about cricket, – straight between the eyes, never had chance to move…..).
I wonder what will be the next reason. I think I said before that Caterham need to publish an engine manual. I wonder if they ever will…………
Driving…(just about)
Sunday.
The car survived overnight with no fluid leaks, so I started the engine – it ran OK. I tried to put in gear, but got the same problem that I cannot get the clutch un-engaged enough. Not quite as bad as before, but I cannot get the car in gear with the engine running. I can start in gear and drive the car forwards and can change from 1st to 2nd. Got up to 30 mph on a short section of private road. To do a U-turn, I had to stop the engine and re-start with reverse gear engaged/clutch in. Then stop again & re-start in 1st/clutch in.
I re-bled the clutch again – fluid is clear and no bubbles. Pumped 2 or 3oz of fluid through for good measure. I must say, it seems just marginal, like another ¼” to ½” of clutch travel would do it.
So, I’m looking for advice. Should I adjust the clutch pedal? What is the procedure? It looks impossible to get at. Even taking pics is difficult!
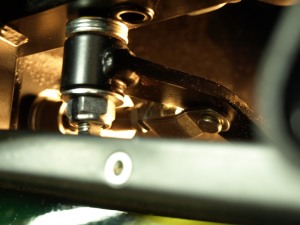


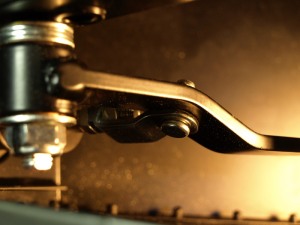
There looks like a circular stopper – towards the left in pics. It seems that I should adjust that more to the right for more travel. Is that possible and is that the right adjustment? How much could I safely move it before hitting a limit on the master cylinder?
To get to all this, there is a pin with clevis connecting the master cylinder shaft to the pedal – looks like that has to come off first. Then, I should remove the pedal – the big nut in the foreground. Then I should loosen all nuts on the shaft & move to the right. Looking for advice from Caterham before I start.
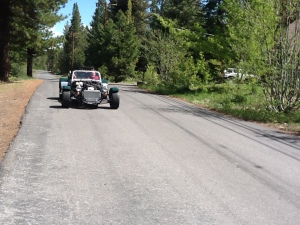
I drove the car on the short private road by my home (about ¼’ mile each way). I noted that I rapidly reached 140mph on the speedometer – but I estimated I’m only doing 35. So about a 4:1 error. How do I adjust the speedo?
When I assembled the rear suspension & drive shafts I noted the fixture aligned the speedo sensor offset from center line of the toothed wheel. I’m guessing that has to be centered, and I can try that. However, it seems like I’m getting 4x the number of pulses – so I don’t see the logic in how this works.

I found a new location for the windscreen washer bottle – so far it appears to not get in the way of anything.

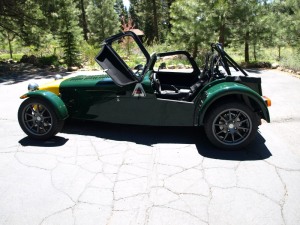
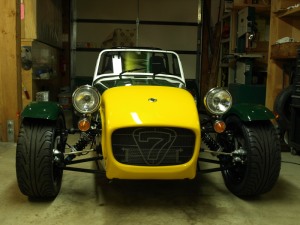
Some more pictures of the car looking mostly done.


I fitted the wing mirrors to the sidescreens, but I need to take the car back out onto the road to adjust them. I adjusted the tire pressures to spec (18 psi). I got most of the wiring tidied up with lots of zip ties – so its looking much neater.
I need to get the front wheel alignment adjusted & the headlights – I’ll probably take it to Stone’s tires to do that as they have the correct alignment stuff.
Engine back in.
Saturday.
Got home from Beijing in the early afternoon. The new clutch had arrived from Caterham. I took photos of the old and new clutches and you can see the flywheel side stick out less on the new one.
Old One:

New One:

3pm started installing the new clutch. This time the engine and gearbox halves came together pretty easily.

Then Alex & I installed the engine back in. Pretty straightforward, no difficulties other than trying to get to some of the bolts and hoses that were in impossible places. We had an hour off for dinner then back to it. We finished off by filling with oil and coolant at 10:30pm then decided to leave it overnight and check for leaks in the morning, if all’s well we’ll try starting it then.


Work on hold
Well, I can’t do any more on the car untill the new clutch arrives in a couple of weeks.
I did some math from my notes on the build, to date, I worked 17 days for a total of 110 hours and 15 minutes. Weekends up to 14 hour days and weekdays 2 or 3 hours, in the evenings mostly.
Getting the new clutch & engine re-installed & connected up should take another 10 hours, if nothing else goes wrong.
I started filling out DMV forms.
Lighted up
Sunday.
Randy & Tim were both surprized about my putting in the gearbox first and then the engine & joining in the car. Here’s where I got the idea: http://caterhambuildacademy2012.weebly.com/build-tips.html read the commments on “Engine and Gearbox”.
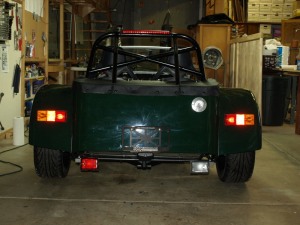
Today, I installed the high level rear facing light (intended to discourage people driving into the back of me). Made connections to the rear left side lamp cable connection both the back light & brake light (via diodes) to the new light. Only downside would be that the brackets stick up 1/2″ which will not allow mounting the hood with them in situ.


I fitted the poppers for the sidescreen hold down straps.
Installed the dip stick to the correct length and bolted the top part to one of the plenum mounts – much easier with the engine out.
Last thing, I put on the nose & bonnet, I won’t be doing any more work until the new clutch arrives and I’m going to be away in Beijing for a week or so on business.
Root cause
Saturday.
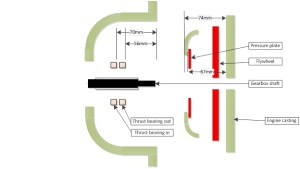
I drew a picture of the clutch components and dimensions to see if I could figure anything out. Looks OK.
I took off the pressure and checked the clutch fitment on the gearbox shaft, also spun it looking for out of true.Looks OK.

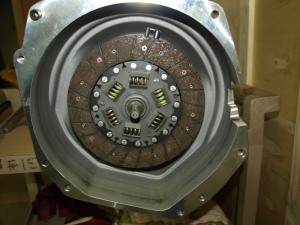


Called Randy, he had John, his engine guy, there. Had me look at the fitment of the clutch plate against the flywheel. Seems like the metal center of the clutch is contacting the flywheel marginally before the the clutch proper. Also looking at the flywheel bolts, can see a scoreline on each bolt in a symetrical pattern matching the spring location members in the clutch center.


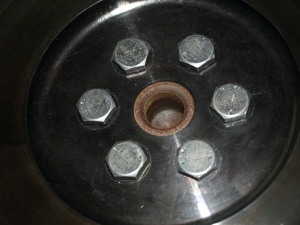
“That’s it”, said John, I had deformed the cluch with that ‘twang’ when mating the engine and gearbox. So I have to get a new clutch. And it won’t arrive before I leave on my trip to Beijing. So engine work is now on hold.
I now had the opportunity to fix the ‘boot’ cover, which involved making holes in the front edge to match the seat belt harness fixing points and re-fitting the bolts with the cover below. Then aligning the cover making a 5/32″ hole in the cover for each popper in turn then fitting the fastener with a special dot tool.


I discovered that I had broken the reverse light switch on the side of the gearbox when I removed it last night. Have to get a new one.

Last thing I did today was to remove the windscreen washer bottle mounting plate.
That positioning was the most stupid place to put it:
- It blocks access to engine mount bolt
- It restricts space for the coolant hoses
- It blocks space where the dipstick can go
- With the inlet plenum in place you can’t fill it without a special tube to reach it.
Don’t know where the washer bottle will go yet – but definitely not where it was.

